|
Open Internet Explorer.
If you are starting a new account, Internet Explorer
will automatically open the connection wizard setup. For new accounts,
start with step 3. Pre -existing users should start at step 1.
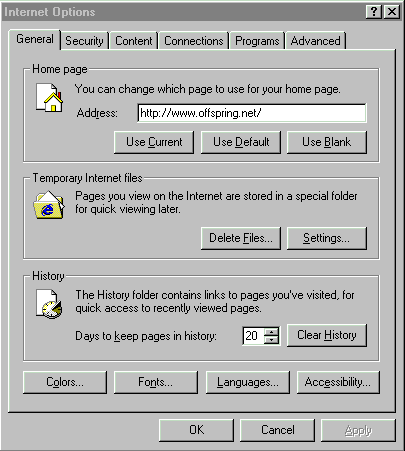
STEP 1: If you click tools in the
menu bar, a drop down box will appear;. then click Internet Options.
The above box will appear with the title Internet Options
.
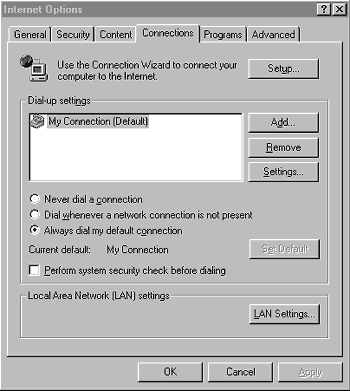
Step 2: Along the top you will find the connections
tab. Click on the connections tab, and you will find the Setup
button at the top right hand side. Click the Setup tab.
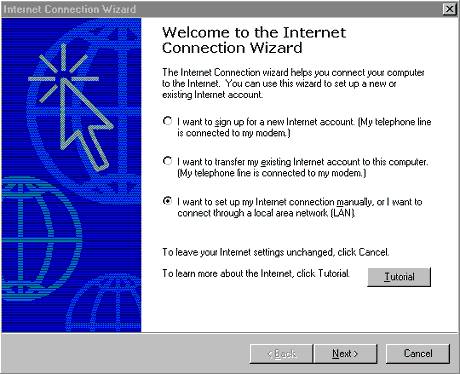
Step 3: Now you are ready to start the setup
process. Above you notice that the manual or LAN setup
is chosen. Once you have clicked the button next to the manual setup
option, then click Next.
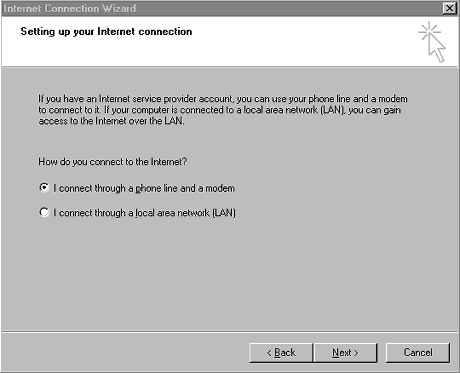
Step 4: You are going designate what type
of Internet connection that you will be using. Unless
you are connecting through a (LAN), click on the I
connect through a phone line and a modem.
Then click Next.
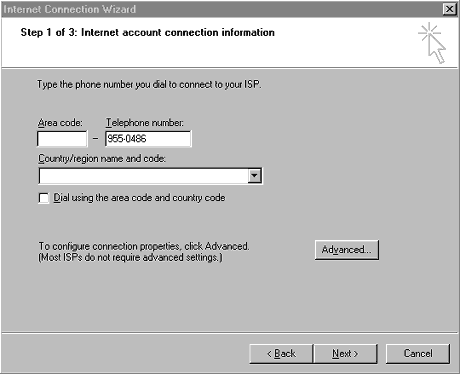
Step 5: In this step, you will be entering
the area code and the telephone number of the ISP. The phone number
is listed in the above box. Also, choose the appropriate country
that you live in by clicking the arrow button at the right of the
Country text field. A drop down box will appear with a selection
of countries/codes. Make sure that the Dial using the area code
and country code box is checked, by clicking on it, then click
Next.
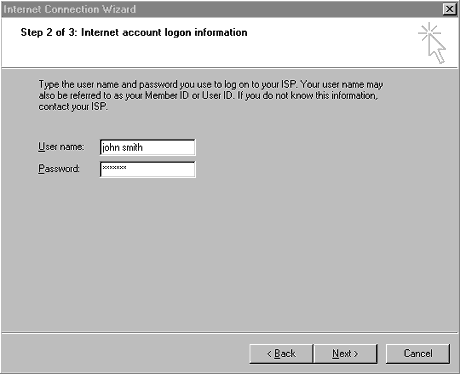
Step 6: In this step, you will enter the
user name and password that you will use to log on the to the ISP.
Once you have entered the user name and password, click Next.
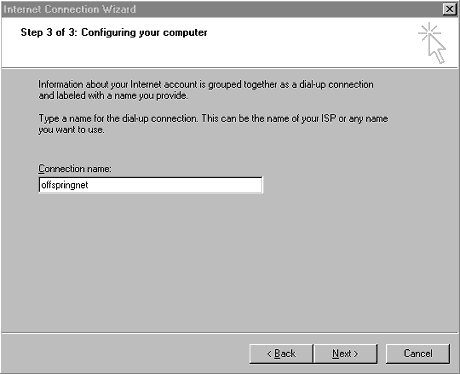
Step 7: Now you will have to enter the name
for the dial up connection. Offspringnet has been used as an example,
however, you can use any name you wish. When you have typed in that
name, click Next.
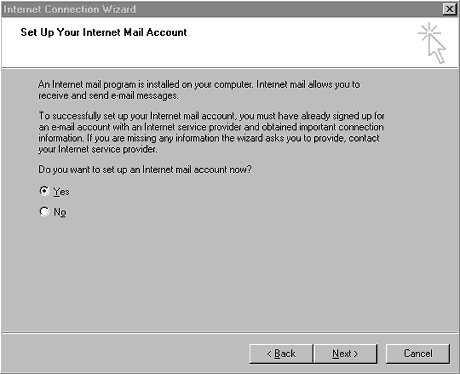
Step 8: You are now ready to setup your Internet
Mail Account. You will be asked if you want to setup your account
now. Check Yes, then click Next.
Step 9: In this step you will type in the
name that will appear in the From field of an outgoing e-mail. Type
that name in the text field, and click Next. 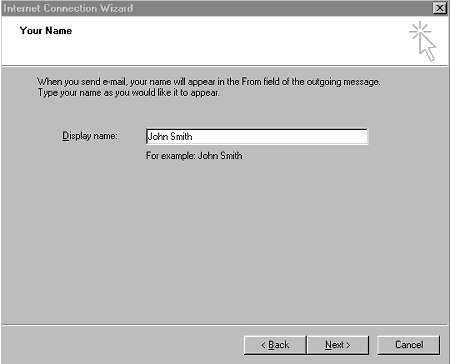
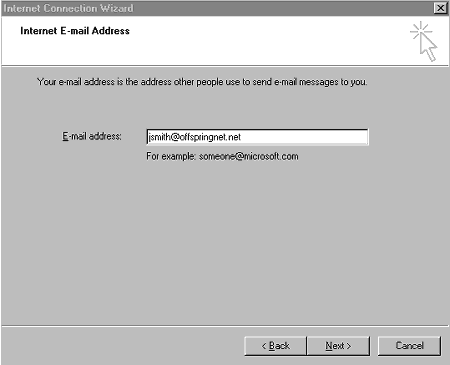
Step 10: This step allows you to type in
your e-mail address. Once you have chosen a name, type it in the
text field followed by @offspringnet.net. Then click Next.
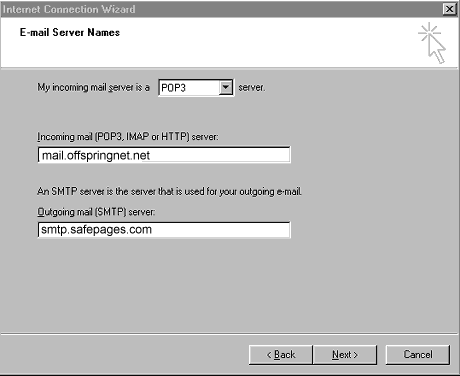
Step11: This step will set your e-mail server
names. You have to type in the names of your incoming and outgoing
mail. These are noted in the box above. Once you have typed in the
information, click Next.
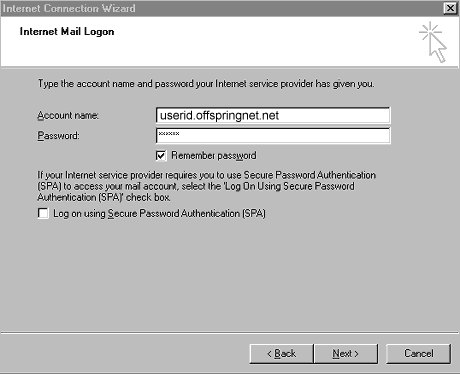
Step 12: This step allows you to type the
account name and password that your ISP has provided for you. Type
in the acount name and password in the appropriate text fields,
then click Next.
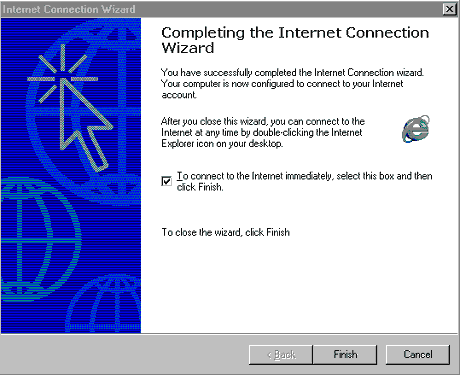
Step 13: Now you have completed the Internet
wizard setup. If you are satisfied with the information you have
provided, check the box To connect to the Internet immediately...
then click Finish. Or leave the box unchecked, click
Finish, and connect later.
|